How to Create a Timer Widget in Flutter?
In this tutorial, we’ll create a simple yet effective timer widget in Flutter. In mobile app development, timers are often utilized for various purposes, such as countdowns, tracking elapsed time, or implementing features like OTP verification.
As a versatile framework, Flutter offers convenient tools for efficiently implementing timers.
Table of Contents
- timer widget in Flutter – let’s understand the code
- Explanation – The timer widget in Flutter
- How to Use the timer widget in Flutter
- Conclusion
timer widget in Flutter – let’s understand the code
Let’s break down the code provided:
import 'dart:async';
import 'package:flutter/material.dart';

class OtpTimer extends StatefulWidget {
  @override
  _OtpTimerState createState() => _OtpTimerState();
}

class _OtpTimerState extends State<OtpTimer> {
  final interval = const Duration(seconds: 1);
  final int timerMaxSeconds = 60;
  int currentSeconds = 0;

  String get timerText =>
      '${((timerMaxSeconds - currentSeconds) ~/ 60).toString().padLeft(2, '0')} : ${((timerMaxSeconds - currentSeconds) % 60).toString().padLeft(2, '0')} Sec';

  startTimeout([int? milliseconds]) {
    var duration = interval;
    Timer.periodic(duration, (timer) {
      setState(() {
        currentSeconds = timer.tick;
        if (timer.tick >= timerMaxSeconds) timer.cancel();
      });
    });
  }

  @override
  void initState() {
    startTimeout();
    super.initState();
  }

  @override
  Widget build(BuildContext context) {
    return Row(
      mainAxisSize: MainAxisSize.min,
      children: <Widget>[
        Icon(
          Icons.timer,
          color: Colors.white,
        ),
        SizedBox(
          width: 5,
        ),
        Text(timerText)
      ],
    );
  }
}
Explanation – The timer widget in Flutter
OtpTimeris a StatefulWidget which allows it to dynamically update its state._OtpTimerStateis the state class associated withOtpTimer.intervaldefines the duration of each tick of the timer, set to one second.timerMaxSecondssets the maximum duration of the timer, in this case, 60 seconds.currentSecondskeeps track of the current elapsed time.timerTextgenerates the text to display in the widget, showing the remaining time in MM : SS format.startTimeout()initializes and starts the timer usingTimer.periodic().initState()is called when the stateful widget is initialized, starting the timer.
Let’s break down the timerText getter method step by step:
timerMaxSeconds - currentSeconds: This calculates the remaining time in seconds by subtracting thecurrentSeconds(elapsed time) from thetimerMaxSeconds(maximum duration of the timer).((timerMaxSeconds - currentSeconds) ~/ 60): This part calculates the minutes remaining in the timer. The~/operator is the integer division operator, which divides the result(timerMaxSeconds - currentSeconds)by 60 and returns the integer part of the result..toString().padLeft(2, '0'): This converts the minutes to a string and pads it with zeros on the left side if it’s less than two digits. This ensures that minutes are displayed with two digits, maintaining a consistent format.((timerMaxSeconds - currentSeconds) % 60): This calculates the remaining seconds after subtracting the minutes calculated in the previous step. The%operator is the modulo operator, which returns the remainder of dividing(timerMaxSeconds - currentSeconds)by 60, giving us the remaining seconds..toString().padLeft(2, '0'): Similar to step 3, this converts the seconds to a string and pads it with zeros on the left side if it’s less than two digits.- The entire expression is then formatted as
'MM : SS Sec', whereMMrepresents minutes andSSrepresents seconds.
How to Use the timer widget in Flutter
To use the OtpTimer widget in your Flutter application:
- Import the file where the
OtpTimerclass is defined. - Place the
OtpTimerwidget within your UI code, wherever you want to display the timer.
For eg:
import 'package:flutter/material.dart';
// Import the OtpTimer widget from the file
void main() {
runApp(MyApp());
}
class MyApp extends StatelessWidget {
@override
Widget build(BuildContext context) {
return MaterialApp(
title: 'Timer Demo',
theme: ThemeData(
primarySwatch: Colors.blue,
),
home: MyHomePage(),
);
}
}
class MyHomePage extends StatelessWidget {
@override
Widget build(BuildContext context) {
return Scaffold(
appBar: AppBar(
title: Text('Timer Demo'),
),
body: Center(
child: OtpTimer(), // Place the OtpTimer widget here
),
);
}
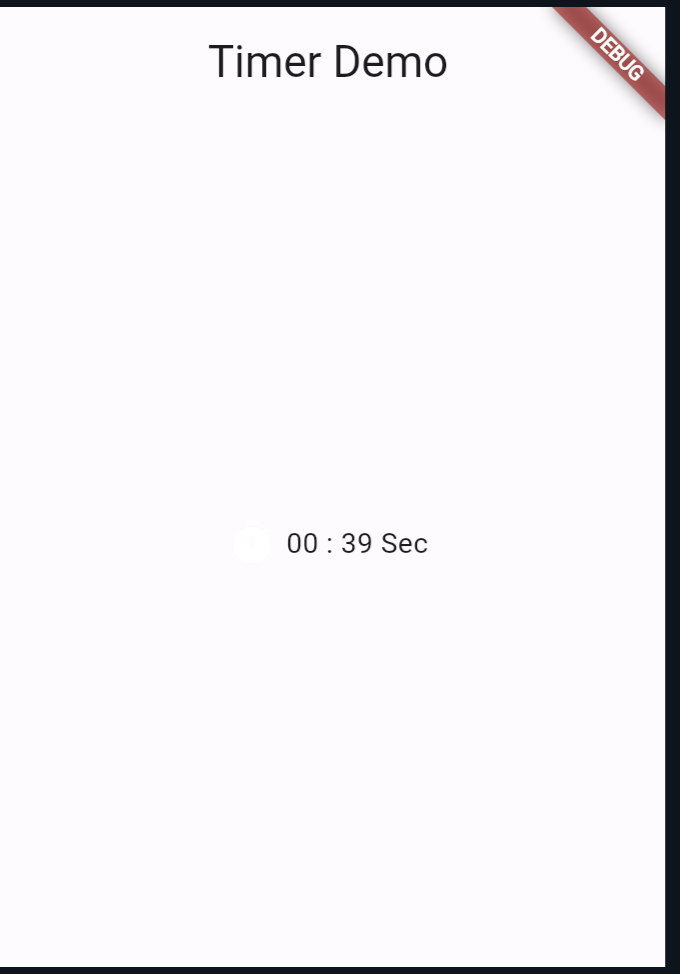
}Output:
Also Read:
Conclusion
Creating a timer widget in Flutter is straightforward, thanks to its rich set of libraries and tools. With the provided code, you can easily integrate a timer into your Flutter applications, enhancing their functionality and user experience.
Feel free to customize the timer widget further to suit your specific requirements and design preferences.
You can visit Flutter’s official documentation for more.

About Ambika Dulal
Lead Mobile App Developer and Tech Consultant specializing in Flutter, Dart, and Firebase.