How to Add Border Radius to Container Flutter?
In this guide, we will explore a key design element on how to add border radius to a container in Flutter. By the end of this tutorial, you’ll have a clear understanding of how to leverage this feature to create stunning, rounded-edge containers that can make your app stand out.
Table of Contents
Steps to Add Border Radius to Container Flutter
Let’s dive into the world of Flutter and discover the art of “Adding Border Radius to Container Flutter” to elevate your app’s design to the next level.
Add Flutter Container Border Radius Only Top
To add a border radius to only the top part of a Container in Flutter, you can use the BorderRadius property and specify different radii for each corner. Here’s a code snippet to achieve this:
import 'package:flutter/material.dart';

void main() {
  runApp(MyApp());
}

class MyApp extends StatelessWidget {
  @override
  Widget build(BuildContext context) {
    return MaterialApp(
      home: Scaffold(
        appBar: AppBar(
          title: Text('Top Border Radius Example'),
        ),
        body: Center(
          child: Container(
            width: 200,
            height: 200,
            decoration: BoxDecoration(
              borderRadius: BorderRadius.only(
                topLeft: Radius.circular(20.0), // Adjust the values as needed
                topRight: Radius.circular(20.0), // Adjust the values as needed
              ),
              color: Colors.blue,
            ),
          ),
        ),
      ),
    );
  }
}
In this code, we create a Container with a width and height of 200. We use the decoration property to set a border radius to only the top corners using the BorderRadius.only property. You can adjust the values of Radius.circular to control the amount of rounding applied to the top corners.
Outputs:

Add Flutter Container Border Radius Only Bottom
To add a border radius to only the bottom part of a Container in Flutter, you can use the BorderRadius property with the bottomLeft and bottomRight attributes. Here’s a code snippet to achieve this:
import 'package:flutter/material.dart';

void main() {
  runApp(MyApp());
}

class MyApp extends StatelessWidget {
  @override
  Widget build(BuildContext context) {
    return MaterialApp(
      home: Scaffold(
        appBar: AppBar(
          title: Text('Bottom Border Radius Example'),
        ),
        body: Center(
          child: Container(
            width: 200,
            height: 200,
            decoration: BoxDecoration(
              borderRadius: BorderRadius.only(
                bottomLeft: Radius.circular(20.0), // Adjust the values as needed
                bottomRight: Radius.circular(20.0), // Adjust the values as needed
              ),
              color: Colors.blue,
            ),
          ),
        ),
      ),
    );
  }
}
In this code, we create a Container with a width and height of 200. We use the decoration property to set a border radius to only the bottom corners using the BorderRadius.only property with the bottomLeft and bottomRight attributes.
You can adjust the values of Radius.circular to control the amount of rounding applied to the bottom corners.
Outputs:
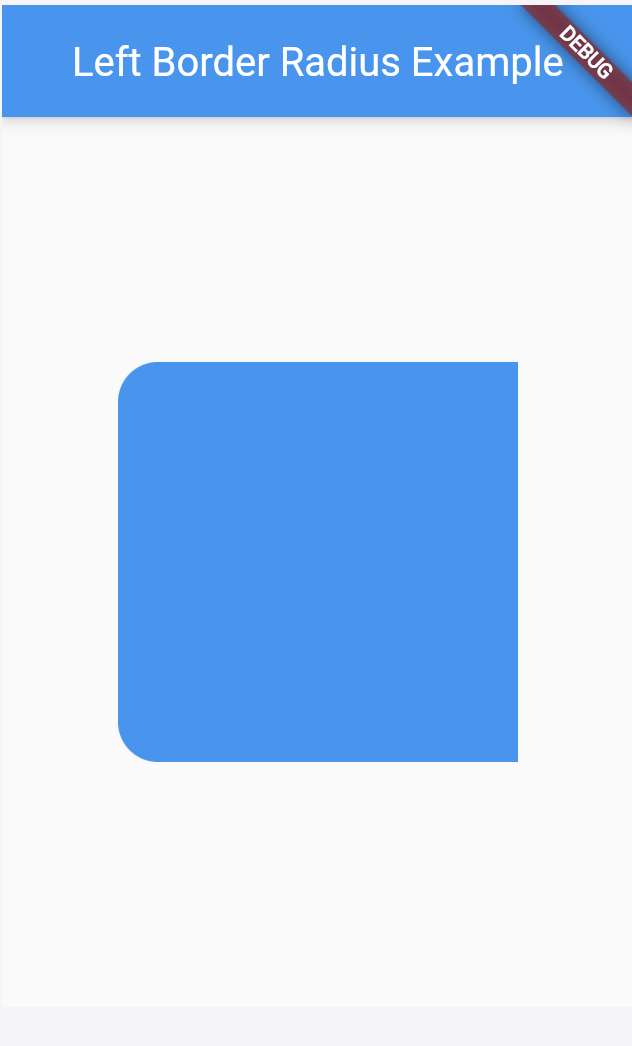
Add Flutter Container Border Radius Only Left
To add a border radius to only the left side of a Container in Flutter, you can use the BorderRadius property and specify the bottomLeft and topLeft attributes. Here’s a code snippet to achieve this:
import 'package:flutter/material.dart';

void main() {
  runApp(MyApp());
}

class MyApp extends StatelessWidget {
  @override
  Widget build(BuildContext context) {
    return MaterialApp(
      home: Scaffold(
        appBar: AppBar(
          title: Text('Left Border Radius Example'),
        ),
        body: Center(
          child: Container(
            width: 200,
            height: 200,
            decoration: BoxDecoration(
              borderRadius: BorderRadius.only(
                topLeft: Radius.circular(20.0), // Adjust the values as needed
                bottomLeft: Radius.circular(20.0), // Adjust the values as needed
              ),
              color: Colors.blue,
            ),
          ),
        ),
      ),
    );
  }
}
In this code, we create a Container with a width and height of 200. We use the decoration property to set a border radius to only the left side using the BorderRadius.only property with the topLeft and bottomLeft attributes.
You can adjust the values of Radius.circular to control the amount of rounding applied to the left side.
Outputs:

Add Flutter Container Border Radius Only Right
To add a border radius to only the right side of a Container in Flutter, you can use the BorderRadius property and specify the topRight and bottomRight attributes. Here’s a code snippet to achieve this:
import 'package:flutter/material.dart';

void main() {
  runApp(MyApp());
}

class MyApp extends StatelessWidget {
  @override
  Widget build(BuildContext context) {
    return MaterialApp(
      home: Scaffold(
        appBar: AppBar(
          title: Text('Right Border Radius Example'),
        ),
        body: Center(
          child: Container(
            width: 200,
            height: 200,
            decoration: BoxDecoration(
              borderRadius: BorderRadius.only(
                topRight: Radius.circular(20.0), // Adjust the values as needed
                bottomRight: Radius.circular(20.0), // Adjust the values as needed
              ),
              color: Colors.blue,
            ),
          ),
        ),
      ),
    );
  }
}
In this code, we create a Container with a width and height of 200. We use the decoration property to set a border radius to only the right side using the BorderRadius.only property with the topRight and bottomRight attributes.
You can adjust the values of Radius.circular to control the amount of rounding applied to the right side.
Outputs:

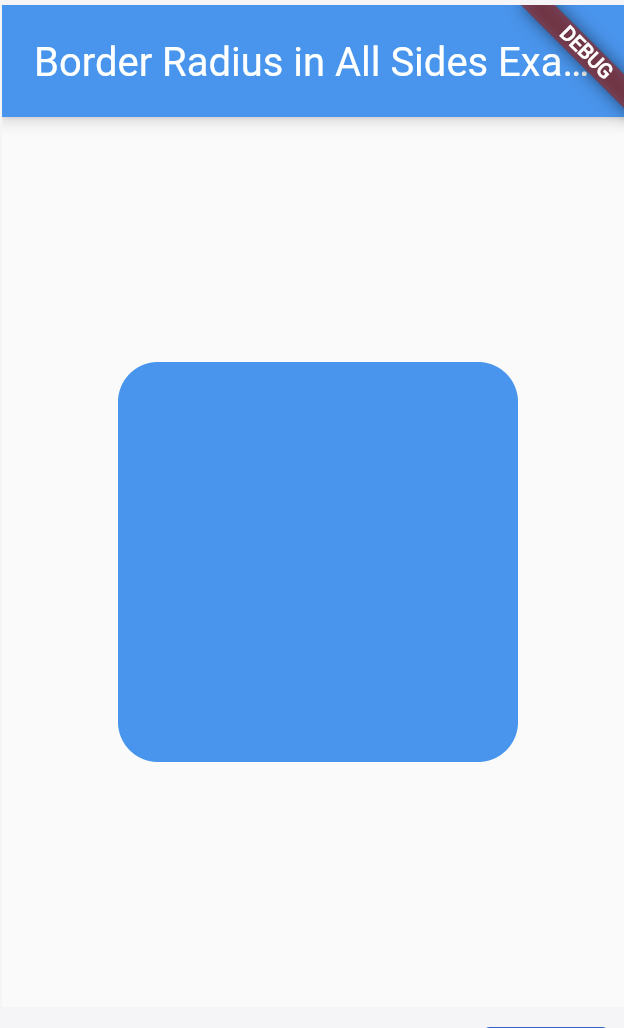
Add Flutter Container Border Radius in All Sides
To add a border radius to all sides of a Container in Flutter, you can use the borderRadius property. Here’s a code snippet to achieve this:
import 'package:flutter/material.dart';

void main() {
  runApp(MyApp());
}

class MyApp extends StatelessWidget {
  @override
  Widget build(BuildContext context) {
    return MaterialApp(
      home: Scaffold(
        appBar: AppBar(
          title: Text('Border Radius in All Sides Example'),
        ),
        body: Center(
          child: Container(
            width: 200,
            height: 200,
            decoration: BoxDecoration(
              borderRadius: BorderRadius.circular(20.0), // Adjust the value as needed
              color: Colors.blue,
            ),
          ),
        ),
      ),
    );
  }
}
In this code, we create a Container with a width and height of 200. We use the decoration property to set a uniform border radius to all sides of the container using the BorderRadius.circular property.
You can adjust the value of Radius.circular to control the amount of rounding applied to all sides of the container.
Outputs:
Also Read Related Tutorials
- How to Write a Good README.md File for Your Flutter Project?
- How to Protect Your Code with Flutter Obfuscation?
- How to Add Custom Fonts in Flutter?
- How to Add Border to Card in Flutter?
Conclusion
You can customize the border radius for different sides of a Flutter Container using the BorderRadius class:
- To add a border radius to only the top side, use
BorderRadius.only(topLeft: Radius.circular(value), topRight: Radius.circular(value)). - To add a border radius to only the bottom side, use
BorderRadius.only(bottomLeft: Radius.circular(value), bottomRight: Radius.circular(value)). - To add a border radius to only the left side, use
BorderRadius.only(topLeft: Radius.circular(value), bottomLeft: Radius.circular(value)). - To add a border radius to only the right side, use
BorderRadius.only(topRight: Radius.circular(value), bottomRight: Radius.circular(value)). - To add a border radius to all sides, use
BorderRadius.circular(value)with the desired radius value.
These approaches allow you to customize the border radius for specific sides or apply a uniform border radius to the entire Container.

About Ambika Dulal
Lead Mobile App Developer and Tech Consultant specializing in Flutter, Dart, and Firebase.