How to Use Hero Animation in Flutter?

One of the standout animations in Flutter is the Hero widget, which makes it easy to create seamless transitions between different screens.
This blog post will explore how to implement Hero animations in Flutter with a practical example.
Table of Contents
- What is a Hero Animation in Flutter?
- Getting Started – Animation in Flutter
- Setting Up the Project
- Example: Implementing Hero Animation
- Running the App
- Conclusion
What is a Hero Animation in Flutter?
A Hero animation in Flutter provides a smooth transition between screens (routes) by animating a shared widget. When you navigate from one screen to another, the Hero widget “flies” from one screen to the next, creating a seamless visual effect that enhances the user experience.
Getting Started – Animation in Flutter
Before we dive into the code, make sure you have Flutter installed and set up on your machine. You can find the installation instructions on the official Flutter website.
Setting Up the Project
- Create a new Flutter project: Open your terminal and run:
flutter create hero_animation_example
cd hero_animation_example
Open the project in your favorite IDE (e.g., VS Code, Android Studio).
Example: Implementing Hero Animation
In this example, we’ll create a simple app with two screens. The first screen will display a list of images, and when an image is tapped, it will transition to the second screen with a larger view of the image using a Hero animation.
1. Define the Main Screen
Let’s start by defining the main screen (HomeScreen) with a list of images.
import 'package:flutter/material.dart';
import 'second_screen.dart';

void main() {
  runApp(MyApp());
}

class MyApp extends StatelessWidget {
  @override
  Widget build(BuildContext context) {
    return MaterialApp(
      title: 'Hero Animation Example',
      theme: ThemeData(
        primarySwatch: Colors.blue,
      ),
      home: HomeScreen(),
    );
  }
}

class HomeScreen extends StatelessWidget {
  @override
  Widget build(BuildContext context) {
    return Scaffold(
      appBar: AppBar(
        title: Text('Hero Animation Example'),
      ),
      body: GridView.builder(
        gridDelegate: SliverGridDelegateWithFixedCrossAxisCount(
          crossAxisCount: 2,
        ),
        itemCount: 4, // Let's assume we have 4 images
        itemBuilder: (context, index) {
          return GestureDetector(
            onTap: () {
              Navigator.push(
                context,
                MaterialPageRoute(
                  builder: (context) => SecondScreen(imageIndex: index),
                ),
              );
            },
            child: Hero(
              tag: 'imageHero$index',
              child: Image.network(
                'https://images.unsplash.com/photo-1716813376299-c1f9d40a7f7b?w=800&auto=format&fit=crop&q=60&ixlib=rb-4.0.3&ixid=M3wxMjA3fDB8MHxlZGl0b3JpYWwtZmVlZHw0fHx8ZW58MHx8fHx8',
                fit: BoxFit.cover,
              ),
            ),
          );
        },
      ),
    );
  }
}
2. Define the Second Screen
Next, create the SecondScreen that displays the selected image in a larger view.
import 'package:flutter/material.dart';

class SecondScreen extends StatelessWidget {
  final int imageIndex;

  SecondScreen({required this.imageIndex});

  @override
  Widget build(BuildContext context) {
    return Scaffold(
      appBar: AppBar(
        title: Text('Hero Animation Example'),
      ),
      body: Center(
        child: Hero(
          tag: 'imageHero$imageIndex',
          child: Image.network(
            'https://via.placeholder.com/600',
          ),
        ),
      ),
    );
  }
}
3. Add Navigation Logic
We already included the navigation logic in the HomeScreen‘s onTap method. When an image is tapped, it navigates to the SecondScreen, passing the index of the selected image.
Running the App
Now that we have both screens set up, run the app using:
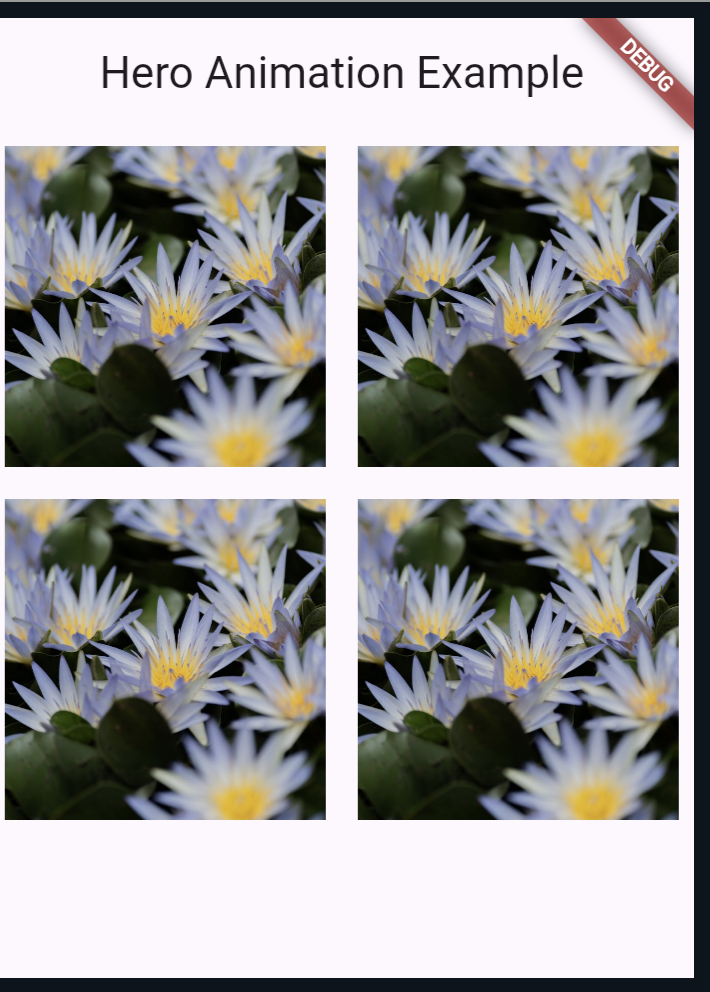
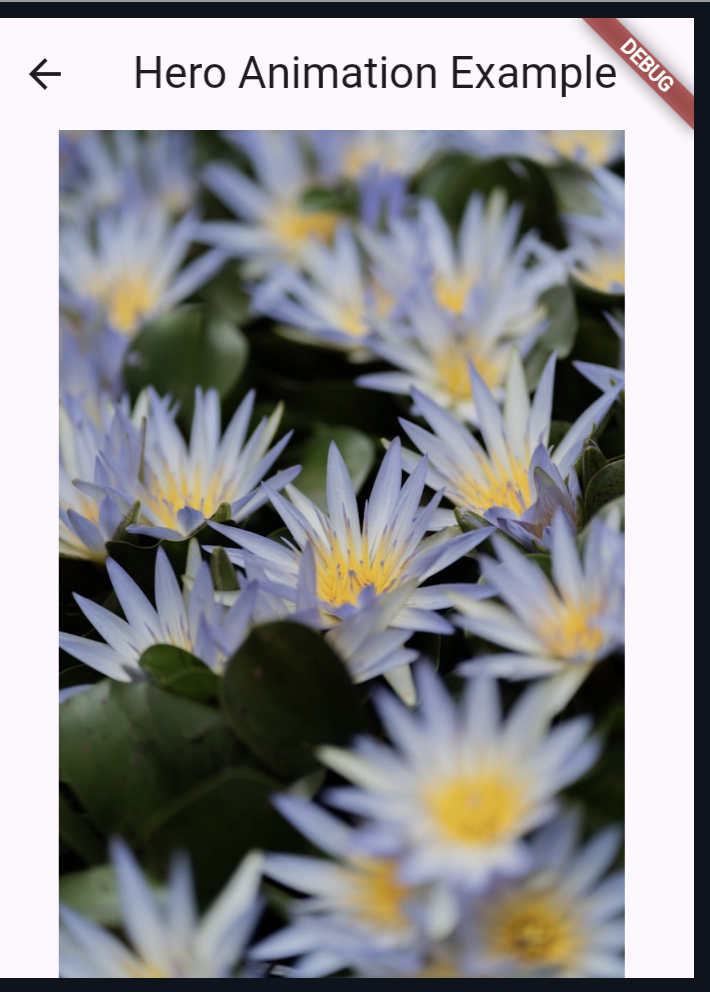
flutter runYou should see a grid of images on the main screen. When you tap an image, it will smoothly transition to the second screen with a larger view of the image, thanks to the Hero animation.
Full code
import 'package:flutter/material.dart';

void main() {
  runApp(MyApp());
}

class MyApp extends StatelessWidget {
  @override
  Widget build(BuildContext context) {
    return MaterialApp(
      title: 'Hero Animation Example',
      theme: ThemeData(
        primarySwatch: Colors.blue,
      ),
      home: HomeScreen(),
    );
  }
}

class HomeScreen extends StatelessWidget {
  @override
  Widget build(BuildContext context) {
    return Scaffold(
      appBar: AppBar(
        title: Text('Hero Animation Example'),
      ),
      body: GridView.builder(
        gridDelegate: SliverGridDelegateWithFixedCrossAxisCount(
          crossAxisCount: 2,
        ),
        itemCount: 4, // Let's assume we have 4 images
        itemBuilder: (context, index) {
          return GestureDetector(
            onTap: () {
              Navigator.push(
                context,
                MaterialPageRoute(
                  builder: (context) => SecondScreen(imageIndex: index),
                ),
              );
            },
            child: Hero(
              tag: 'imageHero$index',
              child: Padding(
                padding: const EdgeInsets.all(8.0),
                child: Image.network(
                  'https://images.unsplash.com/photo-1716813376299-c1f9d40a7f7b?w=800&auto=format&fit=crop&q=60&ixlib=rb-4.0.3&ixid=M3wxMjA3fDB8MHxlZGl0b3JpYWwtZmVlZHw0fHx8ZW58MHx8fHx8',
                  fit: BoxFit.cover,
                ),
              ),
            ),
          );
        },
      ),
    );
  }
}

class SecondScreen extends StatelessWidget {
  final int imageIndex;

  SecondScreen({required this.imageIndex});

  @override
  Widget build(BuildContext context) {
    return Scaffold(
      appBar: AppBar(
        title: Text('Hero Animation Example'),
      ),
      body: Center(
        child: Hero(
          tag: 'imageHero$imageIndex',
          child: Image.network(
            'https://images.unsplash.com/photo-1716813376299-c1f9d40a7f7b?w=800&auto=format&fit=crop&q=60&ixlib=rb-4.0.3&ixid=M3wxMjA3fDB8MHxlZGl0b3JpYWwtZmVlZHw0fHx8ZW58MHx8fHx8',
          ),
        ),
      ),
    );
  }
}
Output 1:
Output 2:
Also read:
- Flutter Project Ideas for Beginners: 15 Apps to Get Started
- How to Create a Toggle Button in Flutter?
Conclusion
Hero animations in Flutter are a powerful and easy-to-use feature that can significantly enhance the user experience by providing smooth and visually appealing transitions between screens.
By following this guide, you can create seamless transitions in your Flutter applications with minimal effort.
Feel free to customize the example further by adding more complex layouts, different types of widgets, or additional screens. The possibilities are endless with Flutter’s flexible and robust animation capabilities.

About Ambika Dulal
Lead Mobile App Developer and Tech Consultant specializing in Flutter, Dart, and Firebase.