Firebase Crashlytics to a Flutter Application
By the end of this tutorial, you’ll know how to implement Firebase Crashlytics to a Flutter Application. let’s dive into the details.
Table of Contents
- Introduction
- Traditional Way – Firebase Crashlytics to a Flutter Application:
- Through CLI Tools: Firebase Crashlytics to a Flutter Application
- Step 1: Install Firebase CLI
- Step 2: Create a Firebase Project
- Step 3: Add Firebase to your Flutter project
- Step 4: Add Firebase Crashlytics dependency
- Step 5: Configure Firebase and Crashlytics using Firebase CLI
- Step 6: Initialize Firebase in your Flutter app
- Step 7: Enable Crashlytics in Release mode
- Step 8: Test Crash Reporting
- Step 9: View Crash Reports
- Conclusion
Introduction
Firebase Crashlytics is a powerful tool that helps developers track, prioritize, and fix stability issues in their mobile applications. In this blog post, we will explore how to integrate Firebase Crashlytics into a Flutter application, allowing you to receive real-time crash reports and gain insights into the health of your app.
Prerequisites:
- Flutter is installed on your machine.
- Firebase project created on the Firebase Console.
Traditional Way – Firebase Crashlytics to a Flutter Application:
Step 1: Create a Flutter Project
If you haven’t already created a Flutter project, run the following commands in your terminal:
flutter create my_flutter_crashlytics_app
cd my_flutter_crashlytics_app
Step 2: Add Firebase to your Flutter project
Go to the Firebase Console (https://console.firebase.google.com/), create a new project, and follow the setup instructions to add Firebase to your project.
Once you have your google-services.json file, place it in the android/app directory for Android and GoogleService-Info.plist in the ios/Runner directory for iOS.
Step 3: Add Dependencies
In your pubspec.yaml file, add the Firebase and Crashlytics dependencies:
dependencies:
  flutter:
    sdk: flutter
  firebase_core: ^latest_version
  firebase_crashlytics: ^latest_version
Run flutter pub get to fetch the dependencies.
Step 4: Initialize Firebase in your Flutter app
In your main.dart file, initialize Firebase:
import 'package:firebase_core/firebase_core.dart';

void main() async {
  WidgetsFlutterBinding.ensureInitialized();
  await Firebase.initializeApp();
  runApp(MyApp());
}
Step 5: Configure Firebase Crashlytics
Add the following code to your main.dart to enable Crashlytics:
import 'package:firebase_crashlytics/firebase_crashlytics.dart';

void main() async {
  WidgetsFlutterBinding.ensureInitialized();
  await Firebase.initializeApp();

  // Enable Crashlytics in release mode
  if (!kReleaseMode) {
    await FirebaseCrashlytics.instance.setCrashlyticsCollectionEnabled(false);
  }

  FlutterError.onError = FirebaseCrashlytics.instance.recordFlutterError;

  runApp(MyApp());
}
Step 6: Test Crash Reporting
Run the following command to open the Firebase Console and navigate to the Crashlytics section:
firebase open crashlyticsThis command opens the Firebase Console directly to the Crashlytics section, allowing you to view crash reports.
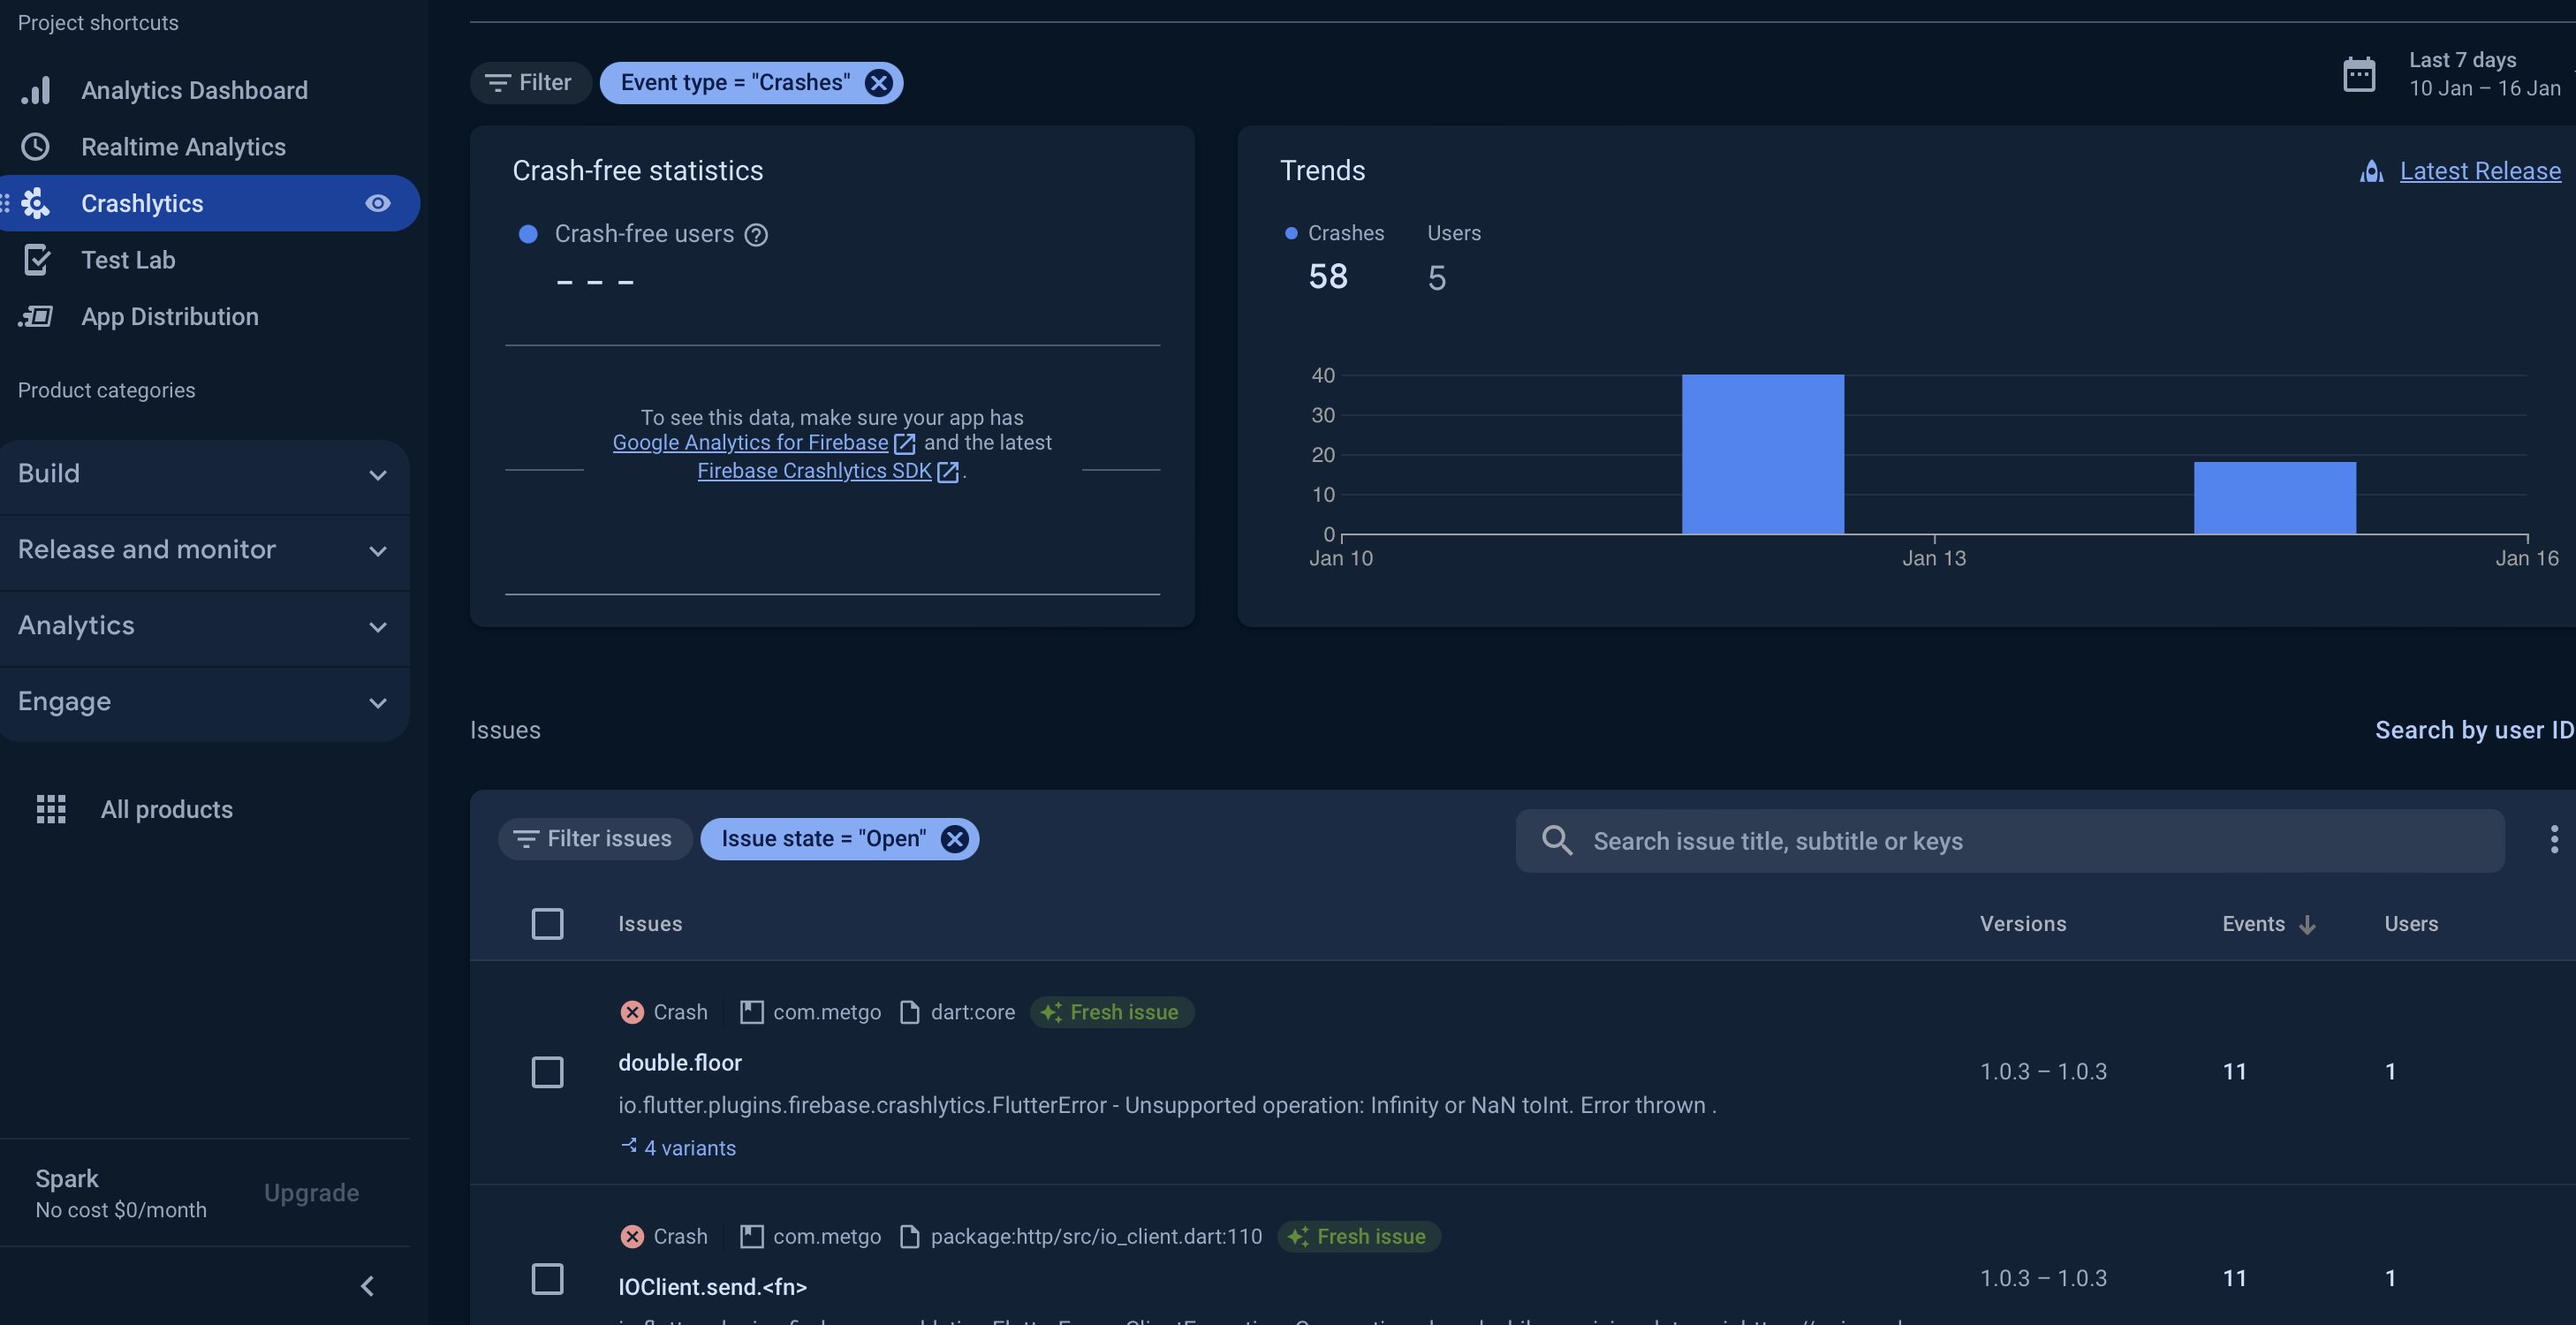
Step 7: View Crash Reports
After triggering a crash, open the Firebase Console, navigate to the Crashlytics section, and you should see the crash report for your test crash.
Through CLI Tools: Firebase Crashlytics to a Flutter Application
Certainly! Firebase CLI tools can streamline the process of setting up Firebase and integrating Crashlytics into your Flutter app. Below are the steps using Firebase CLI:
Step 1: Install Firebase CLI
Ensure you have the Firebase CLI installed. If not, install it using:
npm install -g firebase-toolsOpen a terminal and log into Firebase using your Google account:
firebase loginInstall the FlutterFire CLI globally
dart pub global activate flutterfire_cliStep 2: Create a Firebase Project
Run the following command to create a new Firebase project:
firebase initFollow the prompts to set up Firebase for your project, including selecting the Firebase services you want to use.
Navigate to your Flutter project directory if you have any:[ Previous Project ]
cd path/to/your/flutter/projectRun the FlutterFire CLI to start the app configuration workflow:
flutterfire configureThe CLI will guide you through the configuration process and generate necessary files for Firebase services.
Step 3: Add Firebase to your Flutter project
Navigate to your Flutter project’s root directory and run:
flutter create .This command initializes Firebase for both Android and iOS platforms.
Step 4: Add Firebase Crashlytics dependency
Run the following commands to add Firebase Crashlytics dependency to your Flutter project:
flutter pub add firebase_core flutter pub add firebase_crashlyticsStep 5: Configure Firebase and Crashlytics using Firebase CLI
Run the following command to automatically configure your Flutter app with Firebase and Crashlytics:
firebase use --addThis command associates your Flutter project with a Firebase project, creates or updates the required configuration files, and enables Crashlytics.
Step 6: Initialize Firebase in your Flutter app
Ensure your main.dart contains the Firebase initialization code:
import 'package:firebase_core/firebase_core.dart';
import 'firebase_options.dart'; // Replace with the actual filename

void main() async {
  WidgetsFlutterBinding.ensureInitialized();

  await Firebase.initializeApp(
    options: DefaultFirebaseOptions.currentPlatform,
  );

  runApp(MyApp());
}
Step 7: Enable Crashlytics in Release mode
Run the following command to enable Crashlytics in Release mode:
flutter build apk --releaseThis command ensures that Crashlytics is enabled for release builds.
Step 8: Test Crash Reporting
Test crash reporting by intentionally causing a crash in your app.
Step 9: View Crash Reports
Run the following command to open the Firebase Console and navigate to the Crashlytics section:
firebase open crashlyticsThis command opens the Firebase Console directly to the Crashlytics section, allowing you to view crash reports.
Also, Read Related Tutorials
- A RenderFlex overflowed by 36 pixels on the right using row
- How to hide debug banner from the application main page in Flutter?
Conclusion
Using Firebase CLI tools simplifies the process of setting up Firebase and integrating Crashlytics into your Flutter app. By following these CLI-based steps, you can efficiently configure and manage Firebase services, ensuring a smooth development and monitoring experience.
Resource

About Ambika Dulal
Lead Mobile App Developer and Tech Consultant specializing in Flutter, Dart, and Firebase.